
We get it; it’s tough to avoid getting wet when your tummy sticks out almost as far as your arms. Luckily, we’ve got you covered with this easy maternity dishwashing apron to protect you from sink and bath time splashes!

I’m at the point in pregnancy where I have to sidle up to the sink sideways in order to reach the faucet. After too many splashes and spills, I decided it was time to protect myself.
I had already sewn my kids simple dishwashing aprons from a piece of color-changing oilcloth I got on sale, and there was a square left over that they like to squirt with my ironing spray bottle. But it was plenty big to cover my baby bump, so I decided to commandeer it for my own apron.
This apron can be used for washing dishes, watering plants, bathing toddlers, heavy-duty cleaning, or if your raincoat won’t zip up over your baby bump. It’s an essential mother’s apron for a variety of needs.
Design Considerations for the Dishwashing/Bath Time Waterproof Apron
Beyond a waterproof tummy, I also wanted terrycloth to dry my hands when needed; that fabric was leftover from a baby hooded bathrobe I made my one-year-old. But I couldn’t use that for the chest, because I would not be rubbing my hands there, so I used a piece of outdoor canvas my daughter liked when canvas was on sale at JoAnn’s and I was buying some for a different project. I figured it would offer some water protection along with a splash of color.
I kept the terry just to the edges of the tummy section so it would be loose enough to use like a towel when I needed to dry my hands. This also avoids too much bulk in the middle, especially with pleats to help the oilcloth drape over my bump.
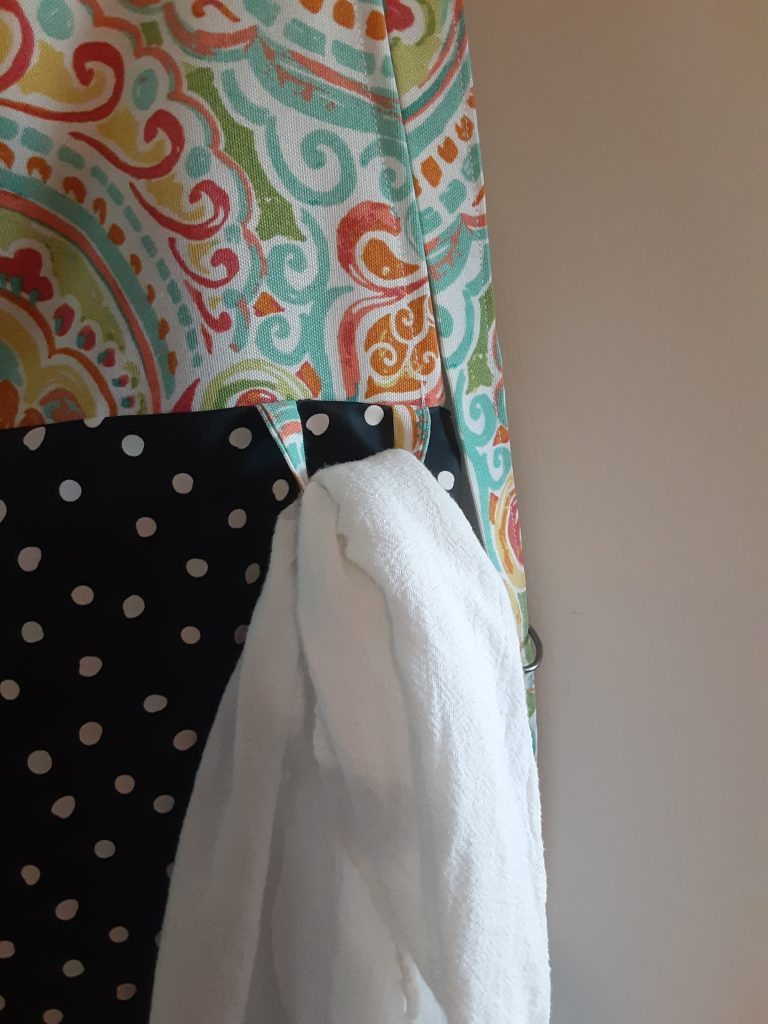
Unfortunately, pockets would mean more holes poked in the waterproof fabric, and thus potential leaks. Instead, I opted for loops in the waist seam. A towel or washcloth is easily tucked through, and it’s also kind of like a work-apron hammer loop—you could stick a spatula or a big spoon in there if needed. For mostly water-based activities, I figured that was enough.
I also wanted to try this kind of cross-back apron instead of the usual neck loop + waist tie. For maternity purposes, it gives you maximum flexibility of fit as your shape changes.

It isn’t really nursing-friendly, but I don’t foresee ever nursing throughout the day and being heavily pregnant at the same time. Although, I suppose you could technically use it as a nursing cover in a pinch, since it has such broad coverage. (Side note: stay tuned for nursing-friendly apron tutorials to come!)
Here’s how to make your own maternity apron.
What You Need:

I made this maternity apron with scraps from other projects, but if you are starting fresh, you will need
- 3/4 yard of oilcloth, vinyl, plastic tablecloth, back of an old raincoat, or some other waterproof material
- 1/4 yard terrycloth (60 inches wide)
- 1/2 yard of 60-inch woven fabric like canvas, or 3/4 yard of 45-inch fabric (you can get by with 1/2 yard of the 45-inch in a pinch—you will just sew the ties differently)
Wash your fabrics and square them off. Take special care with the waterproof fabric.
In terms of other materials, you will need the following:
- Two 1-inch D-rings, or other ring to hold straps.
- A heavy duty woven sewing machine needle (the red and purple one). And sewing machine (if you are doing this by hand, more power to you!)
- Matching or coordinating thread
- An iron and ironing surface
Cut Your Pieces
I wanted my maternity apron to be pretty wide for good coverage. Here are my pieces:
- From the waterproof fabric: a 27-inch square.
- From the terrycloth: an 8-inch strip by 60-inches, cut into three 20-by-8 rectangles.
- From the woven: an 18-by-9 1/2 piece for the chest, and the rest for strips. That is, four 4-by-45-inch strips. Note: if you are using a smaller amount of fabric, you will need four 2-inch-wide strips instead.
Take one of your strips and cut off 4 inches from the bottom, then cut that in half, to make two 4-by-2-inch mini strips. These are dishtowel loops. If you don’t have D-rings, make two additional mini strips.
Making the Straps
Start by sewing your strips together with a diagonal seam, like making a quilt binding. Match the ends of the strips right sides together, and sew across the diagonal so the seam opens out to a straight line. Press, cut seam allowance to about 1/4-inch, and press seam open.


Press in half (I like to do just barely off-center to make it easier to pick up the back side when sewing), then press edges to the middle, then press in half again. You are making binding tape. Sew the edges down.

If you are looking to save fabric, simply fold your strips right-sides-together and stitch with a 1/4-inch seam allowance. Turn to right side and press. Turning won’t be fun, but there are lots of techniques online to make it easier. Maybe run a piece of yarn down the tube, attach it at one end, and use that to help draw it through?
For the mini-strips, follow the directions above to make mini binding tape.
Don’t worry about finishing the ends yet.
A Word on Oilcloth
You will want to use care when handling the oilcloth, or whatever waterproof fabric you have selected. Not only is it expensive, but the needle holes are permanent and ultimately perforate the fabric, making it easy to tear.
To save yourself from tears, use a long stitch length, and avoid poking any extra holes. Make sure any pin holes are within the seam allowance. Keep a close eye on your bobbin so you don’t have to re-sew any part, be careful about backstitching, and be very conscientious so you won’t have to rip anything out. If you do have to rip stitches, you will want to increase the seam allowance to sew in a different spot—this will be fine, though, since it’s an ample square of fabric.
If you have clips or clothespins to use to hold everything together instead of pinning, so much the better!
Assembling the Maternity Apron Skirt
Okay. To begin: Find and mark the center of the top edge of your oilcloth square. If you use a pin, keep the holes within the seam allowance. Mark 3 inches on either side, and pull your new marks 1 inch toward the center to make a small pleat. Baste 1/4 inch or so to hold the pleats down, making sure the edge is straight. This will help the fabric curve over your belly.

Take two of the terrycloth rectangles, and finish one long edge of each with a zig-zag stitch or by turning under and stitching. I know my terry sheds like the dickens.
Match the corners of the remaining rectangle to the ends of the rectangles you just finished to make a big U-shape (see picture). Sew together with a 1/2-inch seam allowance, at the same time finishing the exposed inner edge of the middle section.

Keeping all holes within the 1/2-inch seam allowance, pin the terrycloth U to the oilcloth square. Mine isn’t perfectly even since I was working with scraps, but you can adapt this to what you have, too.
Cut two 3-inch pieces from the end of your strap strip, run each through a d-ring, and fold in half. Sandwich these between the layers so the strap ends are caught in the seam allowance. Alternatively, make loops with your two extra mini-strips.
Stitch the outer edges with your longest stitch length, and zig-zag or otherwise finish the edges so the terry doesn’t fray. DO NOT sew the top together yet. Trim bottom corners, but don’t turn yet.
The Apron Top
Fold your rectangle “the hamburger way” and cut a slant from the bottom corners to 2-3 inches in from the top corners. This will make a classic apron-top shape and prevent gaping at the top. You can also add pleats for shaping like on the tummy piece, if desired.

Fold the sides under 1/4 inch, then another 1/4 inch. Stitch and press. Repeat for the top edge.

Assembling the Maternity Dishwashing Apron
Sandwich the apron top between the oilcloth and the terry at the waist seam as follows:
- Oilcloth, right side up. Be sure the pleats are nice and flat, and if pinning, keep pins in the seam allowance.
- Two mini-strips for towel loops, positioned at the edges of the apron top so ends are in the seam allowance (see picture). The apron top will be shorter than the tummy piece.
- Apron top, right side down and centered.
- Terrycloth, right side down.


Sew the waist seam with a 1/2-inch seam allowance. Finish the seam allowance with a zig-zag to keep that terry from shedding so much.
Trim corners and turn so terrycloth is at the back.
Apron Details and Finishing Touches
Cut your long strap strip in half and attach at the shoulders. Line the edge up with the seam line, stitch, then fold over and stitch again to capture the raw edge.

Topstitch close to the edge to help keep the terry from coming around to the front, or understitch by sewing the terry to the seam allowance (so the stitching won’t show on the front). Topstitch along your bottom terry piece to keep it from falling down. I know this makes some holes in the oilcloth, but I assume the terry will absorb anything that might seep through.

Put on your new apron! Cross the straps over your back, run them through the d-rings (or loops), and tie them. Cut straps to your desired length and finish the ends.
Variations on the Maternity Apron
Make this apron your own! You can mix it up according to the scraps you have, your size, and your intended use. For example:
Of course the measurements are all adaptable, and the steps would remain the same.
You could make this apron with pockets on the terrycloth inside, if you like. Or even use a lighter fabric there or none at all, relying on the towel loops for hand drying. Of course, you can also omit the towel loops if you wouldn’t use them.
If you are making this apron specifically for bath time, you might want to use oilcloth for the apron top as well.
Stick with woven fabric for the straps, but you could use leftover knit or even part of an old T-shirt for the apron top, if you like. It would be a great way to reuse a T-shirt that is too small, has holes, or for some other reason has become obsolete. I would either stitch mine to a woven fabric backing or use some sturdy interfacing, though, to help it hold up in a relatively heavy-duty apron.
You could even change up the fastening methods. You are smart, and you know what you want. Take this tutorial as a starting point, and make the apron just the thing you need!
Enjoy Your Waterproof Maternity Apron!

If you sew this maternity apron and it solves all your sink-splashing problems, please come back and give it 5 stars!
If you haven’t started nesting yet, pin it for later!
Check out my other sewing projects here.

Waterproof Maternity Apron
Save your growing baby bump from spills with this full-coverage, waterproof apron for dish washing, bath time, and more.
Materials
- 1/2 - 3/4 yard woven fabric
- 1/4 yard terrycloth
- 3/4 yard oilcloth, vinyl, or other waterproof fabric
- Coordinating thread
- Two 1-inch D rings
Tools
- Sewing machine with heavy-duty woven needle (the red and purple one)
- Fabric scissors or rotary cutter and mat
- Ruler or measuring tape
- Iron and ironing board or other surface
Instructions
- Cut oilcloth into 27-inch square, terrycloth into three 8-by-20-inch rectangles, and woven fabric into an 18-by-9 1/2-inch rectangle and four 4-by-45-inch strips.
- Make the straps: Sew long woven strips together and press seams open. Press edges to center and fold in half. Stitch edge down to make strap tape. Alternately, cut entire strap in half, fold those pieces lengthwise, stitch, turn, and press. If making towel loops, cut a 4-inch section off of the strap before making strap tape, cut in half lengthwise to make two narrow strips, and sew into mini tape as above.
- Make the tummy piece: Make two 1-inch pleats 3 inches from the center of one side of the oilcloth square. Sew terrycloth rectangles into a boxy U-shape. Finish inner edges to prevent fraying. Place D-ring loops at top corners and sew outer edges to oilcloth square, and finish seam allowances to prevent fraying.
- Make apron top: Cut short edges on a diagonal from bottom corners to 2 inches in from top corners. Turn sides and top under 1/4 inch, then another 1/4 inch. Stitch and press.
- Sandwich layers together at waist seam: oilcloth, towel loops (if using), apron top, terrycloth. Stitch and turn to right side.
- Topstitch around apron tummy edge and across top edge of the middle terrycloth section.
- Sew straps to top corners of apron top. Tie in back, cut to desired length, and finish ends.
Notes
Be careful to minimize holes when using waterproof fabric. Avoid seam ripping where possible, and keep any pin holes within the seam allowance.

Leave a Reply