
You can sew your own modest DIY maternity swimsuit top in an afternoon with this easy tutorial based on a shirt that already fits!

Swimsuits are hard enough to find. When you are expecting, it can be even tougher to find something with the right fit and adequate coverage. I decided to use a maternity tee-shirt I already had to draft a quick pattern for a DIY maternity swim top.
Getting Started
Let’s start with expectations: This is not a complicated swimsuit. I wear a cheap sports bra from Target underneath it, so there are no sewn-in cups. (If you want that option, check out my thoughts at the end of the tutorial for guidance.) I used bottoms from another swim set, since that’s not where most of the body-shape changes happen. So it’s basically a maternity top. You could use this tutorial to make a non-swimwear maternity top, too!
You are going to need some fabric—the exact amount depends on how big your top will be. Most knits are 60 inches wide, so you will probably be able to get away with one yard, depending on the size of your shirt.
I put my pattern pieces so my shirt’s width ran across the fabric width (selvage to selvage), and I fit both front and back as well as the sleeves across the width. The length of the pieces was about 32″, plus 4″ for ties, and that took me to one yard.
I got my swim fabric at spandexworld.com on sale a while ago. Knitfabric.com has a lot of cute swimwear patterns, and I’m planning to go with them if I make any more swimwear.
You will also need 1/4″ swim elastic or regular elastic for the neckline.
Sewing with Knits
Even the most basic machine will be able to sew knit fabrics with a zig-zag stitch. Do not use a regular straight stitch! Although, honestly, it probably doesn’t matter much for this pattern, you don’t want your seam to break when the fabric stretches.
Most machines will also have fancier stretch stitches or imitation overlock stitches. You could also serge the seams, except where you need the seam allowances.

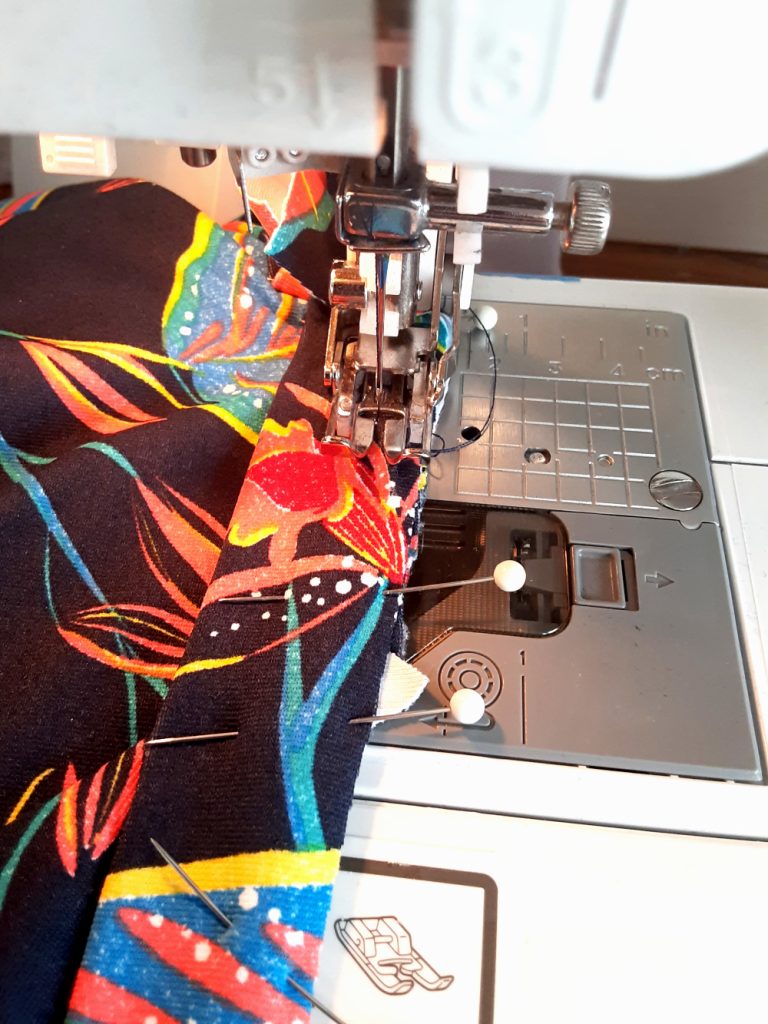
I used a walking foot for the first time on this project, and it helped keep the fabric from slipping and stretching as I went. You absolutely do not need one; just be careful of this as you go. Sew a few scraps first to get the hang of it.
There are lots of good resources, blogs, and tutorials out there for sewing with knits.
Step 1: Drafting the Pattern
You will start with a shirt that fits you—or fit you before pregnancy. The shoulder area is the important thing.

I used a raglan exercise top from Inherit co. It’s one of my favorite tops because it looks good during pregnancy as well as after, and I thought the raglan style would be sporty. You can use any tee that fit you pre-pregnancy—just be sure to add several inches of extra length for the ruching. I would add at least 6 or 8 extra inches—you can always cut length off, but you can’t make it longer!
If the shirt was pretty snug through the midsection, you might want to add a couple inches of width for ease as well. I know I don’t like my clothes skin-tight.
I traced mine onto a big roll of tracing paper, but wrapping paper or butcher paper or anything you have that is big enough will work. You should have a front, a back, and sleeve (cut two mirror-images). If you are relatively accurate in your tracing I wouldn’t worry about straightening edges or making sure it’s perfectly symmetrical, but if you are a little more perfectionist, go ahead.
The most important thing to check is that the sleeve seam will fit the armhole.

Step 2: Cut Out Your Fabric
I was planning to add seam allowances as I cut with this one, but the kids were awake and a little too interested in the pins and scissors while I cut, so I forgot for most seams! Don’t be like me. Add a 1/2″ seam allowance to side and sleeve seams either right on the pattern you traced, or as you cut it out. Include 1 1/4″ for the sleeve and bottom hems, or just 1″ if you don’t mind raw edges on the inside.
Also think about how you want to finish your neckline. I sewed on a separate piece, so I added only the 1/2″ seam allowance for the neckline. If you want to turn yours under and sew the elastic directly to the neckline or run it through a narrow casing that’s of-a-piece with the rest of the shirt, add accordingly.
If you forgot seam allowances like me, cut additional strips to widen. Take into account both any extra width you need and the seam allowances that will connect the pieces. I decided to use these as my ruching channels.
Next, cut 4 long strips for the side gathers (30 inches each by 1 inch wide). Be sure to cut across the grain of the fabric so that when you pull the strips, they curl into little tubes. To be safe, cut a couple of scrap squares and test them first.

Pull these strips along their length to curl them into tubes.

I also cut a 4″ wide strip for the neckline, which you may wish to do if you are binding the neck as I did. If you plan to just roll it over, skip this. To find the length you need, measure around the neckline of your pattern pieces and add a couple inches just in case.
Step 3: Sew Side Seams and Channels
If you forgot your seam allowances like me, sew in your 4″ side panel pieces. I chose to sew two panels in on each side, wrong sides together, then sew down the middle to make channels.

For everyone else, sew with a 1/2″ seam allowance. Then sew very close to the edge of that allowance to make a 1/2″ channel.
Step 4: Cut and String Cords
At this point, you may want to make a buttonhole 1 1/4″ from the bottom of your shirt (to accommodate the hem). I didn’t bother and just cut holes after I hemmed the shirt, since spandex doesn’t really unravel, but it would make a nicer finish with an actual buttonhole. Your machine will come with instructions, or you can do a couple of lines of fine zigzag with very short stitch length and cut a slit between them.
Fasten a safety pin to the end of one of your long cords and run it up the channel. Repeat for the other three cords. Pin them in place at the arm hole edge and sew over them at just less than 1/2″ seam allowance so the stitches are hidden.

Step 5: Sew and Hem Sleeves
You left extra hem allowance on your sleeves, right? Turn that under 1/4″, and then another inch. Stitch in place. Stitch each sleeve right sides together to make a tube shape. If you added an insert to the body sides, be sure to sew an insert in here, too, so the edge lengths match.
Step 6: Set Sleeves into Shirt

If you are doing a raglan shirt, match up your shoulder seams on the sleeves and the shirt front and back. Sew, right sides together, with a 1/2″ seam allowance.
If you are doing a standard tee, sew the body shoulder seams first, then pin and set in the sleeve. Adjust for ease as necessary. It doesn’t have to be perfect!
Step 7: Finish Neck
First, I marked the back of the neck with a safety pin, since I always mix up front and back in handmade garments. Then, I smoothed out the neckline with scissors since I hadn’t been too careful in the drafting step. If you do this, be sure to try the shirt on so the neckline doesn’t get too low.
I used my 4″-wide strip to make an elastic casing for my neck. Fold it in half, then stitch it to the neck hole, joining at the back. Run your length of elastic through and tie loosely before sewing down the back. At this point, I tried on the shirt to make sure the neck lay flat, then sewed the back neck seam down.
You can also simply turn over the excess at the neck and zig-zag or stretch-stitch elastic right into the seam. Be sure to pre-stretch your elastic.
I don’t always have the best luck with this technique. In addition, I only had regular elastic (not swimming elastic), and I want to be able to replace it if it gets stretched out or degrades in pool chlorine.
Step 8: Finish the Hem
Turn the bottom under 1/4″ and then another inch and stitch around. DO NOT CATCH THE DRAWSTRINGS! I used a more decorative stretch stitch for this, just for fun.
Step 9: Gathers and Ties
Tie a knot at the base of each drawstring cord, then cut off any excess. Try on the shirt and shimmy the fabric up to the height you want, adjusting the gathers as you go. Tie the two cords together at each hip. I recommend a double knot.

Notes on Lining or Adding Bra Cups
If I were lining this top, I would just cut another front body piece out of the lining fabric, baste it to the wrong side of my front body piece of swim spandex, and sew with them as one unit.
Then, I would tack bra cups to just the lining. You could also add a 1″ or wider elastic band under the cups for extra support. Just be sure your stitches are to the lining only so they don’t show on the outside of the shirt.
Enjoy Your DIY Maternity Swimsuit Top!

I hope your swim top looks awesome!
Comment below on how it goes! What kinds of swimwear you like best for modesty, maternity, nursing, or in general? I’m always looking for ideas!
Leave a Reply